Host Website the Correct Way: AWS S3, CloudFront & Route53
- Arjav Dave
- Sep 10, 2023
- 8 min read

Are you looking to deploy your static website on AWS S3 for maximum speed and efficiency? Look no further! In this ultimate guide, we will walk you through the process step-by-step, ensuring a smooth and successful deployment.
AWS S3 (Simple Storage Service) offers a reliable and scalable solution for hosting your static website files.
By utilizing AWS S3 and CloudFront, you can use its robust infrastructure and global content delivery network (CDN), resulting in faster page loading times and a seamless user experience.
Throughout this guide, we will explore the critical components of deploying your website on AWS S3, including setting up your S3 bucket, configuring bucket policies and permissions, and enabling static website hosting. We will also cover strategies for optimizing your website's performance and ensuring maximum efficiency using CloudFront.
Prerequisites
Hosting any website requires a domain name. In this tutorial, we'll not go through purchasing the domain name. Instead, it is assumed that a domain name is already purchased.
Secondly, it is also assumed that the nameservers can be changed to point to AWS nameservers (Route 53). This is required to map the domain name to the CloudFront distribution. You can always request your domain name provider to change the nameservers.
Don't worry if it's too complicated! Each section will be thorough enough to explain the above in detail.
Let's get started!
Overview
In this step-by-step tutorial we'll be going through the following steps:
Create S3 Bucket
To host a static website on AWS S3 a bucket needs to be created. To start creating a bucket visit this link.
Enter the name of the bucket. Usually, the bucket name should match the domain for which it is being hosted. For example, as per the screenshot below the bucket name is kept as daveops.co.in. It is not necessary though to follow this protocol.
Next, Select the region in which the bucket will be hosted. This will matter only in terms of pricing. Since CloudFront CDN is used for content delivery the location wouldn’t matter much in terms of performance.
Lastly, scroll to the bottom and click Create Bucket.

Once created, upload all the HTML, CSS, JS, and any other files for your static website to the bucket.
Great! The bucket is created. However, it is not accessible to the public since all the content will be loaded through CloudFront.
Important Note:
Most tutorials mention to turn on the ‘Static Website Hosting’. But, since the Amazon CloudFront will be used to serve the files, this seems to be an unnecessary step.
Secondly, many tutorials including the one provided by Amazon, suggest turning off the ‘Block all public access’ setting. But it is not required as well and the same reason applies i.e., the Amazon CloudFront is responsible for serving the content and not the bucket itself.
The S3 bucket itself doesn’t allow to serve content over https. For that reason (and many more) a CDN is needed. There are multiple CDN providers in the market like Amazon CloudFront, Cloudflare etc. For this tutorial, Amazon CloudFront is the preferred choice to stay in the AWS ecosystem.
Before the CloudFront is set up it is required to get an SSL certificate for the domain. This ensures that the website can be served over HTTPS with a valid SSL certificate. Let’s hop to the next section to check how it’s done.Once created, upload all the HTML, CSS, JS, and any other files of your static website to the bucket.
Setup SSL Certificate
An SSL certificate essentially secures data by encrypting the data transmitted from the server to the browser. Hence, the man-in-the-middle attacks are near zero and no sniffing of data is possible when in transit.
To create an SSL certificate, visit this link. Here select Request a public certificate if not already selected and click the Next button.

Secondly, enter the name of the domain for which the SSL certificate should be created. Once entered, create the certificate which will take back to the list of certificates. If the certificate is not visible, simply refreshing the page will display it.

The status of the certificate will be Pending Validation. This is because the domain has not been validated with the DNS provider yet.
To validate the certificate, open the details of the certificate and scroll to the Domains section. Copy and add the given CNAME record name and value to your DNS provider.

Once added, it may take up to 48 hours to reflect the certificate as issued depending on the DNS provider. For GoDaddy, the average time seems to be within a minute once the CNAME record is added.
The status will change to Issued once the certificate is verified.

Create & Configure a CloudFront Distribution
Amazon CloudFront is a content delivery network (CDN) service built for high performance, security, and developer convenience. This helps to deliver websites securely. Secondly, Amazon CloudFront has worldwide edge servers, the server response time is in milliseconds.
To get started click on this link. From the drop down select your bucket.

Once the bucket is selected, a section for Origin access will be visible. It mentions the properties of the bucket and how CloudFront can access the origin, in our case a bucket.
As mentioned in the note above, the access to bucket shouldn’t be public. AWS has come up with an Origin Access Control (OAC) setting, which is the preferred approach. Principally, OAC allows certain CloudFront distributions to access the S3 buckets.
Select the Origin Access Control settings and click Create control setting button.

A new pop up will open to enter the settings. Enter the Name of the control setting and optionally a description. For a static website, leave all other settings as default. For details of the settings visit this site.
Click Create to create the control setting. CloudFront will automatically set the newly created OAC in the dropdown.

Next, scroll down to the Web Application Firewall (WAF) section. The choice of enabling or disabling the WAF is left up to you. $8.00 will be charged for enabling the WAF. No additional settings are required to setup the WAF.
For the purposes of this tutorial, WAF will be disabled by selecting Do not enable security protections.

Since the static website’s domain name should be mapped to CloudFront a CNAME should be added.
To do so, scroll to the Settings section and enter the static website’s domain name in the Alternate domain name (CNAME) — optional text field. It will make sure that the static website’s domain will be internally using the CloudFront for serving content. A few other settings are required in addition to this in the Route53. This is covered in the later section of Configure the Route53.

Lastly, an SSL certificate needs to be attached to the CloudFront distribution. From the drop-down menu, select the SSL certificate created in the previous section of Setup SSL Certificate.

Scroll to the bottom to create the CloudFront distribution. When created, a warning message is displayed on the top. It essentially mentions to add the relevant permissions in the S3 bucket related to the OAC.
Click the Copy policy button and store the text temporarily in notepad. It will be needed in the next section to configure permissions for the S3 bucket.

Before moving forward, proper redirection of incorrect paths should be setup. To do so, visit the Error pages of the CloudFront distribution details page. Next, click on the Create custom error response button.

When an incorrect path/object of S3 bucket is accessed by the CloudFront distribution, a 403 Forbidden response is received. In such scenarios, redirect the user back to the /index.html (or your html home page if it’s different) with a 200 success HTTP response code.
To configure, enter the settings as per the screenshot below and click Create custom error response button.

The CloudFront distribution will take around 10–15 minutes to deploy. In the meanwhile, let’s setup the S3 bucket with relevant policies and permissions.
Configure S3 Bucket
To allow the CloudFront distribution created in the previous step to allow access to the Bucket, some permissions need to be setup.
Firstly, navigate to you bucket details page in S3 and select the permissions tab. Secondly, scroll down to the Bucket policy section and click the Edit button.


A page to add the policy will be visible. In here, paste the policy generated from the previous section. The policy fundamentally allows the CloudFront to provide access to the bucket. Click on Save Changes to save the policy.

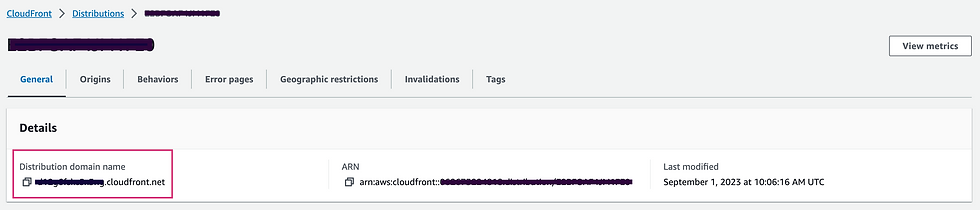
The CloudFront Distribution and the S3 Bucket are now successfully configured to serve static content. To view your website, go back to your CloudFront distribution and open the General tab. Finally, open the Distribution domain name in your browser. Your website will be loaded blazing fast owning to the CloudFront’s fantastic CDN edge servers.
Configure Route53
To map the domain name to the CloudFront distribution a hosted zone should be created in Route53. A hosted zone is a container for records, and records contain information about how you want to route traffic for a specific domain.
To create a hosted zone, visit the link. Next, enter the domain name for which the hosted zone should be created. Add an optional description for the hosted zone. Since, the hosted zone is for the internet the default Public hosted zone is fine. Go ahead and create the hosted zone.

The NameServer (NS) and the State of Authority (SOA) records are created by default.
Important Note:
If your domain contains DNS records, import it to the newly created hosted zone. Use the Import zone file functionality of Hosted Zone to import the DNS records all at once. To do so, export the zone file from your DNS provider and import it.
An Alias (A and AAAA) record should be created for connecting the domain name to the CloudFront distribution. Proceed by clicking the Create record button.

For our use case, the Simple routing should suffice. For more details, visit the official documentation by AWS. Click Next to move forward.

Next, click the Define simple record button to add a record.

As per the screenshot below, leave the subdomain blank to point the root domain to CloudFront distribution. Secondly, from the drop-down Record type select the A — Routes traffic to an IPv4 address and some AWS resources.
Next, select the drop-down for Value/Route traffic to as Alias to CloudFront distribution.
Lastly, in the search field search and select your CloudFront distribution from the autocomplete field.
Click the Define simple record to create the record.

Repeat the same process for adding a AAAA record in addition to the A record by Defining a new simple record.
VOILA! You’re done. Visit your static website domain in the browser and see it magically serve the content from your bucket over a secure channel with blazing fast speeds.
Conclusion and Next Steps
AWS S3 offers several advanced features and options that can further enhance your static website. Here are a few examples:
Integrate with AWS Lambda: Use AWS Lambda functions to add dynamic functionality to your static website. You can leverage Lambda functions to process user input, interact with databases, or perform complex calculations.
Implement website analytics: Utilize AWS services like Amazon CloudFront and Amazon S3 access logs to gain insights into your website's usage and performance. Analyze the logs to identify trends, optimize your content, and improve user experience.
Set up custom error pages: Customize the error pages that are displayed when visitors encounter errors on your website. This allows you to provide helpful information or redirect users to alternative pages, improving the overall user experience.
Implement versioning and lifecycle policies: Enable versioning for your S3 bucket to maintain multiple versions of your website files. Additionally, configure lifecycle policies to automatically move older versions to lower-cost storage tiers, optimizing costs.
By exploring these advanced features and options, you can take your static website on AWS S3 to the next level, adding functionality, gaining insights, and optimizing costs.


Comments